How to Integrate Deep Learning Models Using Flask API?

Deep learning models are a significant and direct way to transition from AI solutions into everyday practical applications. Although it is necessary to train a model, it is ideal to incorporate it into publicly used systems. Flask, the lightweight web framework in Python, allows implementing the deep learning model in Flask and converting it into API. This article will guide you through all the application deployment steps, from setting Flask up to hosting the API to embracing your deep learning model for production purposes.
Setting Up the Flask Environment
The first step in integrating your deep learning model application is to configure the Flask environment. It is one of the most accessible and flexible Python frameworks, perfect for API development. Here’s how you can get started.
Step 1: Install Flask
Begin by installing Flask in a virtual environment to keep your dependencies isolated. Create a virtual environment using the command below:
Code Snippet:
python3 -m venv flaskenv
source flaskenv/bin/activate
Once activated, install Flask:
Code Snippet:
Step 2: Initialize a Basic Flask App
After installation, it’s time to set up a simple Flask app to verify everything works. Create a new Python file (e.g., app.py) and add the following basic code:
Code Snippet:
from flask import Flask
app = Flask(__name__)
@app.route('/')
def home():
return "Flask App Running!"
if __name__ == "__main__":
app.run(debug=True)
This code creates a minimal Flask application with a single route (/) that returns a simple message.
Step 3: Running the Flask App
Run your Flask app by executing the following command in your terminal:
Code Snippet:
You should see a message indicating that the app is running on http://127.0.0.1:5000/. Click this URL on your browser to ensure Flask's environment is set up correctly.
After performing all these installations, you will have a setup environment allowing the deep learning model to be integrated with Flask for deployment.
Preparing Your Deep Learning Model for Deployment
Completing all optimization and packaging tasks is essential before employing your deep learning model for production. This framework involves selecting, putting the model in a deployable order, and reviewing critical requirements such as model size and dependencies.
1. Selecting and Saving the Model
Most deep learning models routinely use common frameworks such as TensorFlow, Keras, and PyTorch during their training. After the model completes its training and proves satisfactory results, a saving format that will make it simple to retrieve during deployment is required. For Keras and TensorFlow, model serialization often occurs in the .h5 or .pb format. Savings of PyTorch models arise in the .pt or .pth format.
2. Key Considerations Before Deployment
When preparing for deployment, you must keep several factors in mind to ensure smooth integration with Flask:
-
Model size: Longer load times for big models and a higher API latency may be associated with them. Model quantization, together with pruning, can lower size and improve the performance level.
-
Framework dependencies: Ensure that the deployment environment you select supports the vital libraries (like TensorFlow and PyTorch) for executing your model. Setting up production servers will be easier because of the use of a requirements file to define dependencies.
3. Packaging the Model
Once the deep learning model has been saved, all dependencies will be collected and turned into a deployable directory. This should include:
-
The saved model file(s).
-
Any custom scripts that carry out functions before or after preprocessing.
-
A file called requirements.txt contains the necessary Python dependencies.
These steps ensure that your model is ready for deployment, gracefully combined with Flask, and capable of delivering predictions efficiently.
Integrating the Deep Learning Model with Flask
Using deep learning models in Flask calls for smooth integration, allowing the model to engage with the API without bothering and handling prediction requests. Below is a detailed explanation of how to link a deep learning model with Flask and expose it through a RESTful API.
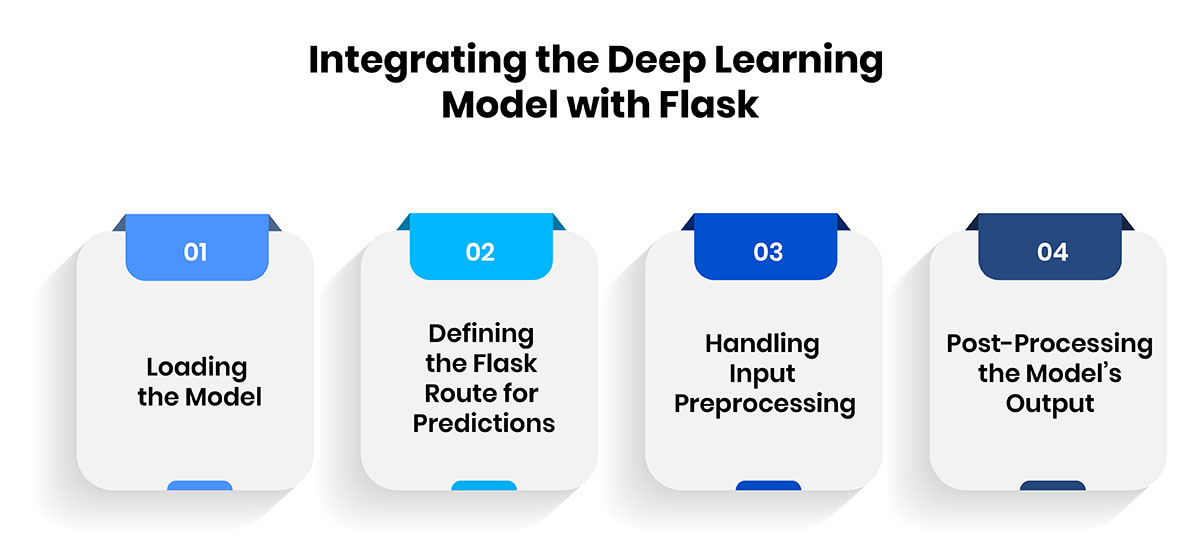
1. Loading the Model
The primary step in the integration workflow is loading your earlier trained deep learning model. When using different frameworks (such as Keras, TensorFlow, or PyTorch), accessible commands make loading models possible. For example, in Keras and TensorFlow, you can use the load_model() function to load the saved model:
Code Snippet:
from tensorflow.keras.models import load_model
# Load the trained deep learning model
model = load_model("my_deep_learning_model.h5")
This allows you to capitalize on the prediction capacities of the model right from Flask. Ensure that you archive your model using a compatible format, either .h5 for Keras or .pt for PyTorch.
2. Defining the Flask Route for Predictions
After establishing the model, the immediate step is to build a route in Flask that deals with input data, creates predictions, and provides them. This route typically manages POST requests, which transport input in JSON format.
The Flask app listens for a POST request directed to the /predict endpoint on this code. Upon getting the request, the data given is preprocessed ahead of model processing for prediction. The result returns as a JSON response after that.
3. Handling Input Preprocessing
It is necessary to preprocess the input data to correspond to the model's expected format. Depending on the model, this might involve:
-
Normalizing inputs or reformatting input arrays
-
Altering categorical data into numerical forms
-
Organizing the input into a tensor (for models of deep learning)
4. Post-Processing the Model’s Output
When the model generates a prediction, you might have to post-process the output, especially for classification tasks or results with multiple dimensions. This might involve:
-
Generating a probability from logits (e.g., softmax conversion).
-
Associating predicted labels with categories that are understandable by humans.
-
It is creating a file that is easily consumable by APIs.
Integrating these steps will help your Flask application give precise real-time forecasts from the deep learning model, delivering a trustworthy deployment alternative for genuine AI solutions.
Building an API for Model Predictions that is RESTful
Creating a RESTful API for your deep learning model provides accessible communication by allowing users to make predictions with HTTP requests. The process of designing endpoints that can manage different types of requests becomes easier with Flask.
Setting out unique routes to use this functionality in your Flask application is essential. All routes relate to a corresponding action, including making a prediction. POST is the most prevalent technique for model predictions as it permits you to securely transmit data to the server.
1. Defining the Prediction Endpoint:
-
Use the @app.route decorator to create a new route for predictions.
-
Set the method to POST to allow input data submission.
-
Example:
Code Snippet:
@app.route('/predict', methods =['POST'])
def predict():
data = request.get_json(force=True)
# Preprocess the input data as required by the model
processed_data = preprocess_data(data['input'])
prediction = model.predict(processed_data)
return jsonify({'prediction': prediction.tolist()})
2. Handling Input Data:
-
Ensure that the input data matches the format expected by your model.
-
Use libraries like NumPy or Pandas for preprocessing, if necessary.
-
Validate the input data to prevent errors and enhance reliability.
3. Returning Predictions:
-
Use jsonify to send the prediction results back to the client in JSON format.
-
Ensure that the response includes meaningful information, making it easy for users to understand the output.
By implementing these steps, you can successfully incorporate your deep learning model with Flask, allowing users to access predictions conveniently. The API simplifies how efficiently the model and client applications communicate while preparing for future evolution, like developing new endpoints for extra features.
Testing and Validating the API
After integrating the deep learning model with Flask, the API must be tested strenuously to check responsiveness. Testing can confirm the validity of the predictions and the system's interaction regarding the different types of requests it is likely to receive.
-
Using Postman: Postman is an intuitive machine widely used for creating, testing, and sending API requests. You can make a post request, pass the input data in JSON format to the /predict, and see how the deep learning model responds.
Example request body:
Code Snippet:
{
"input": [1.5, 2.3, 3.1]
}
-
cURL Requests: One can use cURL to make HTTP requests when testing on the command line. This assists in quickly checking the validity of API responses. Example cURL command:
Code Snippet:
curl -X POST -H "Content-Type: application/json" -d '{"input": [1.5, 2.3, 3.1]}' http://localhost:5000/predict
-
Check for Edge Cases: Find out how your API behaves, such as wrong or missing values, significant values, or wrong value types. This ensures robustness.
-
Monitor Response Times: Check whether the time taken for the input is reasonable enough until the deep learning model predicts a decision on a product.
The act of testing and validation of the API must be emphasized because it assists in determining that your API is stable and effective during actual use.
Handling Model Updates and Retraining
When a deep learning model is deployed, ensuring that you have updated and retrained the model is crucial so that the model used by the application is up to date. The problem is that models can become obsolete due to the data they were trained on changes or becomes new. Here's how to effectively manage model updates and retraining:
-
Retraining the model: It is suggested that if new data is ever incoming, then the model should be updated to increase its effectiveness in the prediction stage. Ensure that your changes are saved in the same format used during modeling for the first rollout.
-
Versioning: Keep previous versions of your model to prevent being stuck in a particular update if it could be better than you had hoped. A model can have version control were, for instance, tools like DVC or Git can be used.
-
Minimal downtime: Some of the best practices to avoid disruptions during the deployment, includes the blue-green method. Additionally, this allows you to put the new model into live service while keeping the previous model live in case the new one is not as efficient or isn’t working as intended.
-
API endpoint flexibility: The various versions of the model should have different endpoints so that it can be determined which version is better than the other.
Thus, with successful updating and retraining strategies, you can make your deep learning model as accurate as possible while maintaining the high efficiency of your application in the long term and reducing the impact of the model update.
Conclusion
Implementing a deep learning model through Flask is a practical and highly adaptable approach to integrating machine learning into practical applications. Flask is best suited for the short development cycle because the tool is easy to deploy and has the power to scale and optimize models. With the advancement of AI, such businesses need to be able to use deep learning models with Flask, and this will be possible with the help of the provided solution. Thus, it is possible to reach long-term effective model deployment solutions by following the deployment and monitoring guidelines and retraining strategies.